It's been a while since I last posted, but the epic deliciousness of this new recipe makes up for it somewhat. I found this recipe online looking for a new gluten-free cupcake recipe, and then played with it a little bit given what I had in my pantry. They're even better than I expected - I served them to people without telling them they were gluten free, and everyone thought they were amazing!
I made these twice - once with dairy cream cheese and once with non-dairy cream cheese. They were super delicious both times, and you couldn't even tell the difference, really (the frosting is mostly sugar anyway).
Recipe (adapted from gluten-free goddess):
Ingredients:
Cupcakes:
1/2 cup sorghum flour
1/2 cup brown rice flour
1 cup light brown sugar
3/4 cup potato starch
1/2 cup sugar
1/4 cup tapioca flour/starch (it's labeled both ways, but it's the same stuff)
1 teaspoon xanthan gum
1 teaspoon baking powder
1 teaspoon baking soda
1 heaping teaspoon ground cinnamon
1 heaping teaspoon pumpkin pie spice
1/2 teaspoon salt
1/2 cup coconut oil*
1 cup canned pumpkin
2 eggs, beaten or egg replacer
2 teaspoons vanilla extract
Frosting:
2 cups powdered sugar
1/4 cup chilled vegan cream cheese (or whipped dairy cream cheese)
2-4 tablespoons pure maple syrup, as needed (I used 3 tablespoons)
*A note on coconut oil: it should be a solid at room temperature, but I used it once when my apartment was warmer and it had melted to be a liquid, and it worked just as well (and was possibly even easier to work in because it wasn't solid).
Instructions:
Preheat oven to 350º F. Line 2 12-muffin pans with cupcake liners.
In a large mixing bowl, whisk together the brown rice flour, sorghum flour, light brown sugar, potato starch, white cane sugar, tapioca starch, xanthan gum, baking powder, baking soda, pumpkin pie spice, cinnamon, and sea salt.
Add in the coconut oil by pieces, cutting in with a fork, until the mixture resembles the consistency of sand. Add in the pumpkin, eggs, and vanilla, and beat on medium high with an electric mixer for 1-2 minutes until the cake batter is smooth and stretchy. Gluten-free batter tends to ride up on the mixer, so be prepared to have to scoop it off with a spoon to mix everything together.
Spoon the cake batter into the cupcake liners (mine made about 20 cupcakes) and smooth out the tops.
Bake in the center of the oven for about 22 to 25 minutes, until the tops are firm but springy and a toothpick inserted into the middle comes out clean.
Cool in the pan for a few minutes; then remove them from the baking pan and cool on a wire rack for one hour before frosting.
To make the frosting:
Pour the powdered sugar into a small mixing bowl. Add the cream cheese and beat with an electric mixer. Add the maple syrup one tablespoon at a time until the frosting is smooth (don't add it all at once or the frosting will be too wet).
Enjoy!!
Gluten-Free and Glitter
When I stopped eating gluten, I worried that my cupcake-baking days were over. Instead, I started baking with a vengeance to try to find the best gluten-free recipes and to convert great recipes into gluten-free ones. And with the rest of my time, I work on painting cool designs on my nails. Sometimes they're related to events going on, and sometimes they're just fun. Enjoy discovering new art!
Saturday, October 27, 2012
Tuesday, April 3, 2012
Gluten-Free M&M Cookies
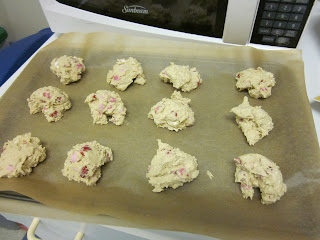
For my birthday last week, my friend gave me a new gluten-free baking cookbook. I decided to alter a recipe for Toll House Cookies to make m&m cookies - because who doesn't like m&m cookies? Just baking them put me in a better mood - eating them was even better! I used Valentine's Day m&m's, so they're all white, pink, and red. The full recipe is at the bottom of this post.
In a medium bowl, measure out 2/3 c. potato starch.
Mix in 1/3 c. tapioca starch and 1 1/4 c. brown rice flour.
Add 1 tsp. baking soda.
Add 1/4 tsp. xanthan gum and 1/8 tsp. salt. Mix well to combine.
In a large mixing bowl, cream 2 sticks of unsalted butter (room temperature) until white.
Add white sugar.
Add brown sugar and beat butter and sugars until fluffy, about 5 minutes.
Add 1 egg and 2 tsp. vanilla. Blend well. Slowly incorporate the dry ingredients.
Stir in the m&m's. Cover and refrigerate for at least 1 hour before baking.
Preheat the oven to 350ºF. Line cookie sheets with parchment paper. Use an ice cream scoop to scoop up mounds of cookie dough.
Place mounds of cookie dough on the cookie sheet, leaving about 2-3 inches between the mounds.
Bake cookies for 10-12 minutes. The edges will be firm but the middles will be soft.
Let the cookies cool on the baking sheets for about 10-15 minutes. Transfer the cookies to a wire cooling rack, and allow to cool completely before storing.
That's it! Delicious cookies!
Gluten-Free M&M Cookies
Ingredients:
2/3 c. potato starch
1/3 c. tapioca starch
1 1/4 c. brown rice flour
1 tsp. baking soda
1/4 tsp. xanthan gum
1/8 tsp. salt
2 sticks unsalted butter/margarine, at room temperature
3/4 c. packed brown sugar
1/4 c. granulated sugar
1 egg
2 tsp. vanilla
2 1/2 c. m&m candies
Instructions:
1. In a medium bowl, mix together potato starch, tapioca starch, brown rice flour, baking soda, xanthan gum, and salt. Set aside.
2. In a large bowl, cream the butter/margarine until white.
3. Add granulated sugar and brown sugar to the butter/margarine and beat until fluffy (about 5 minutes).
4. Add the egg and vanilla. Blend well.
5. Slowly add the dry ingredients to the butter/margarine/sugars/egg/vanilla mixture.
6. Stir in the m&ms.
7. Cover and refrigerate dough for at least 1 hour before baking.
8. Preheat the oven to 350ºF. Line cookie sheets with parchment paper.
9. Use an ice cream scoop to scoop the dough into mounds.
10. Place mounds of cookie dough on the cookie sheet, leaving 2-3 inches between the mounds.
11. Bake for 10-12 minutes. The edges will be firm but the middles will be a little soft.
12. Let the cookies cool on the baking sheets for about 10-15 minutes. Transfer the cookies to a wire cooling rack, and allow to cool completely before storing.
Floral Nails
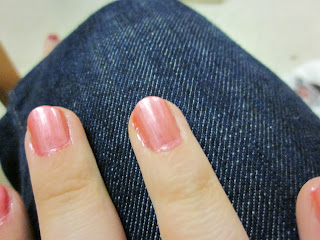
I was in a springy mood, and decided it was time for some floral nails! They're pretty and upbeat :)
Start by applying a clear base coat and then 2 layers of pink nail polish to each nail.
Use a green striper to make vines going across each nail.
Use a toothpick dipped in a bold-colored nail polish to make five small dots, creating a flower near the vine.
Repeat with various colors on each nail.
Add a top coat, and you're done!
It's that easy!
Tuesday, March 20, 2012
Blueberry Muffins (Gluten-Free)
This has been quite a week for posts! Tonight I decided that I wanted to make muffins. I'd been thinking about making them for a while, but I worried they wouldn't come out well. I'm sort of picky about my muffins - they have to be perfect for me to want to eat them.
Preheat the oven to 375°F.
Line a 12-cup muffin pan with paper liners.
Melt butter/margarine (about 1 minute in the microwave). Allow to cool until room temperature.
Blueberry Muffins (Gluten-Free)
Adapted from Driscolls
Ingredients
2/3 cup sorghum flour
2/3 cup tapioca flour (also known as tapioca starch)
2/3 cup brown rice flour
3/4 cup granulated sugar
2 teaspoons baking powder
1 teaspoon xanthan gum
1/2 teaspoon salt
1/2 cup (1 stick) unsalted butter/margarine
1/2 cup milk
2 large eggs
1/8 teaspoon lemon juice
1 teaspoon vanilla extract
1 1/2 cups blueberries (fresh or frozen)
Instructions
1. Preheat oven to 375°F (191°C).
2. Line a 12-cup muffin pan with paper liners.
3. Melt butter/margarine and then let cool to room temperature.
4. Combine sorghum flour, tapioca flour, and brown rice flour in a medium bowl. Add sugar, baking powder, xanthan gum, and salt. Stir until combined.
5. Whisk together butter/margarine, milk, eggs, lemon juice, and vanilla extract in a large bowl.
6. Gradually add dry ingredients to large bowl, stirring until just combined (do not over-stir).
7. Add blueberries to batter. The batter will be thick.
8. Divide batter into muffin cups, filling each about 3/4 of the way full.
9. Bake for 10 minutes.
10. Rotate pan and continue baking for 10 minutes or until muffins are golden brown and a toothpick inserted into the center of a muffin comes out dry.
11. Cool muffins in pan for 3 minutes.
12. Serve muffins warm, or transfer to a wire rack to cool completely. Store at room temperature.
Preheat the oven to 375°F.
Line a 12-cup muffin pan with paper liners.
Melt butter/margarine (about 1 minute in the microwave). Allow to cool until room temperature.
Combine sorghum flour, tapioca flour, and brown rice flour in a medium bowl.
Add sugar, baking powder, xanthan gum, and salt. Stir until combined.
In a large bowl, whisk together butter, milk, eggs, lemon juice, and vanilla. Gradually add dry ingredients until just combined.
Stir in blueberries. The batter will be thick, but don't over-stir.
Spoon the batter into the muffin cups, filling each cup about 3/4 of the way full.
Bake for 10 minutes. Rotate the pan and continue baking for about 10 minutes, or until the tops of the muffins are golden-brown and a toothpick inserted into the center of a muffin comes out dry.
Remove from the oven and cool in pan for 3 minutes. Serve warm, or cool completely on a wire rack.
Enjoy!! Store at room temperature.
Blueberry Muffins (Gluten-Free)
Adapted from Driscolls
Ingredients
2/3 cup sorghum flour
2/3 cup tapioca flour (also known as tapioca starch)
2/3 cup brown rice flour
3/4 cup granulated sugar
2 teaspoons baking powder
1 teaspoon xanthan gum
1/2 teaspoon salt
1/2 cup (1 stick) unsalted butter/margarine
1/2 cup milk
2 large eggs
1/8 teaspoon lemon juice
1 teaspoon vanilla extract
1 1/2 cups blueberries (fresh or frozen)
Instructions
1. Preheat oven to 375°F (191°C).
2. Line a 12-cup muffin pan with paper liners.
3. Melt butter/margarine and then let cool to room temperature.
4. Combine sorghum flour, tapioca flour, and brown rice flour in a medium bowl. Add sugar, baking powder, xanthan gum, and salt. Stir until combined.
5. Whisk together butter/margarine, milk, eggs, lemon juice, and vanilla extract in a large bowl.
6. Gradually add dry ingredients to large bowl, stirring until just combined (do not over-stir).
7. Add blueberries to batter. The batter will be thick.
8. Divide batter into muffin cups, filling each about 3/4 of the way full.
9. Bake for 10 minutes.
10. Rotate pan and continue baking for 10 minutes or until muffins are golden brown and a toothpick inserted into the center of a muffin comes out dry.
11. Cool muffins in pan for 3 minutes.
12. Serve muffins warm, or transfer to a wire rack to cool completely. Store at room temperature.
Hershey's Kisses Nail Design
Chocolate is basically always a good thing, and Hershey's Kisses are just so cute! I decided I'd try devoting my nails to the wonderful candy this week.
Begin this design by applying a base coat to each nail, and then painting each nail brown (use 2 coats).
Use a silver striper to draw slightly rounded triangles for the Kisses.
Use a white striper to make the paper ribbon from the top of each Kiss.
Use a light blue striper to write "HERSHEY'S," putting one letter on each nail (it's only 9 characters, so I put a heart on one pinky).
That's it! Super yummy nail design!
Monday, March 19, 2012
Sunny Day Nail Design
The weather was really nice this past week, and in honor of spring break I decided to do a sunny day nail design. I didn't take pictures every step of the way, but I took pictures of individual nails and will provide instructions. Leave a comment if you have any questions!
Start by applying a base coat to each nail. Next, apply 2 coats of light blue nail polish to each nail. Once that has dried, use a green nail polish to create grass at the bottom of each nail. I used a green striper to give texture to the grass (the striper and the nail polish were different greens). The rest is all just working off of that.
To create clouds, use the tip of a white striper to make dots that touch each other in different formations. I made anywhere from 1-3 clouds on each nail.
To make the birds, use a black striper to create a V-shape that extends farther down than you would normally make a V.
For the tree, start by using a brown nail polish to make the trunk. Next, use a green nail polish and a dotting tool to make green dots above the trunk. You can make the tree as big or as small as you'd like.
For the flowers, start by making the stems with a green striper. For the tulip, I used a lavender striper to make three lines (almost like a W-shape) and then rounded out the bottom. For the other flowers, make a small dot a little bit above the stem. Use another color polish to make 5 dots surrounding the center dot.
Apply a top coat and you're done!
Start by applying a base coat to each nail. Next, apply 2 coats of light blue nail polish to each nail. Once that has dried, use a green nail polish to create grass at the bottom of each nail. I used a green striper to give texture to the grass (the striper and the nail polish were different greens). The rest is all just working off of that.
To create clouds, use the tip of a white striper to make dots that touch each other in different formations. I made anywhere from 1-3 clouds on each nail.
For the sun, just take a yellow nail polish and make a dot using a medium-large dotting tool. I did this on both of my pointer fingers.
To make the birds, use a black striper to create a V-shape that extends farther down than you would normally make a V.
For the tree, start by using a brown nail polish to make the trunk. Next, use a green nail polish and a dotting tool to make green dots above the trunk. You can make the tree as big or as small as you'd like.
For the flowers, start by making the stems with a green striper. For the tulip, I used a lavender striper to make three lines (almost like a W-shape) and then rounded out the bottom. For the other flowers, make a small dot a little bit above the stem. Use another color polish to make 5 dots surrounding the center dot.
Apply a top coat and you're done!
Salted Caramel Chocolate Chip Cookie Bars (Gluten-Free)
When I saw a recipe for Salted Caramel Chocolate Chip Cookie Bars on Brown Eyed Baker, I knew I had to try to convert her recipe to be gluten free. It wasn't too difficult, either (and they would have turned out even better had my oven not been turned off in the middle). They were still super delicious (and very gooey), and everyone in my house was eating them! Scroll to the bottom for the full recipe.
Preheat the oven to 325ºF. Use vegetable oil or canola oil cooking spray to grease an 8" square baking pan (the one I used was glass). Unwrap caramel candy squares and put them to the side.
In a microwaveable bowl, melt unsalted butter or margarine. Leave the bowl to the side to allow it to cool to room temperature.
In a medium bowl, whisk together gluten-free flour, baking soda, salt, and xanthan gum.
In a separate, large bowl, use an electric mixer to mix the butter/margarine, sugar, and brown sugar on medium speed until combined. Add the egg, egg yolk, and vanilla extract and mix until smooth.
Slowly add the dry ingredients and mix on low, until just combined.
Remove the bowl from the mixer and stir in the chocolate chips.
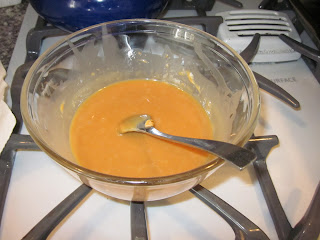
In a medium microwave-safe bowl, combine the caramels and heavy cream. Microwave on high until the caramels are melted, stirring every 20 seconds. This took me 2 minutes and 20 seconds, but times may vary.
Press half of the cookie dough into the greased pan, smoothing with the back of a spoon. Pour the hot caramel over the layer of cookie dough and spread into an even layer. Be sure to leave space around the edges to prevent it from burning. Sprinkle the caramel with sea salt or kosher salt. Drop the remaining cookie dough in spoonfuls and spread over the layer of caramel. Sprinkle some more salt on top.
Bake the bars for about 30 minutes, or until the tops of the bars are golden brown and the edges start to pull away from the pan. Cool the bars (in the pan) on a wire rack to room temperature, and then refrigerate for about 30 minutes to allow the caramel to set. Cut into squares and serve at room temperature (should be stored at room temperature as well).
Salted Caramel Chocolate Chip Cookie Bars (Gluten-Free)
Adapted from Brown Eyed Baker
2 1/8 cups all-purpose gluten-free flour (I used King Arthur Flour)
1/2 teaspoon baking soda
1/2 teaspoon table salt
1/4 teaspoon xanthan gum
1. Preheat oven to 325ºF (163ºC). Grease an 8-inch square pan with vegetable oil spray or canola oil spray; set aside.
4. In a medium bowl, whisk together the flour, baking soda, salt, and xanthan gum; set aside.
Preheat the oven to 325ºF. Use vegetable oil or canola oil cooking spray to grease an 8" square baking pan (the one I used was glass). Unwrap caramel candy squares and put them to the side.
In a microwaveable bowl, melt unsalted butter or margarine. Leave the bowl to the side to allow it to cool to room temperature.
In a medium bowl, whisk together gluten-free flour, baking soda, salt, and xanthan gum.
In a separate, large bowl, use an electric mixer to mix the butter/margarine, sugar, and brown sugar on medium speed until combined. Add the egg, egg yolk, and vanilla extract and mix until smooth.
Slowly add the dry ingredients and mix on low, until just combined.
Remove the bowl from the mixer and stir in the chocolate chips.
In a medium microwave-safe bowl, combine the caramels and heavy cream. Microwave on high until the caramels are melted, stirring every 20 seconds. This took me 2 minutes and 20 seconds, but times may vary.
Press half of the cookie dough into the greased pan, smoothing with the back of a spoon. Pour the hot caramel over the layer of cookie dough and spread into an even layer. Be sure to leave space around the edges to prevent it from burning. Sprinkle the caramel with sea salt or kosher salt. Drop the remaining cookie dough in spoonfuls and spread over the layer of caramel. Sprinkle some more salt on top.
Bake the bars for about 30 minutes, or until the tops of the bars are golden brown and the edges start to pull away from the pan. Cool the bars (in the pan) on a wire rack to room temperature, and then refrigerate for about 30 minutes to allow the caramel to set. Cut into squares and serve at room temperature (should be stored at room temperature as well).
Adapted from Brown Eyed Baker
2 1/8 cups all-purpose gluten-free flour (I used King Arthur Flour)
1/2 teaspoon baking soda
1/2 teaspoon table salt
1/4 teaspoon xanthan gum
12 tablespoons unsalted butter or margarine
1 cup light brown sugar
½ cup granulated sugar
1 egg
1 egg yolk
2 teaspoons vanilla extract
2 cups chocolate chips
10 ounces (about 36) caramel candy squares
3 tablespoons heavy cream
Sea salt or kosher salt, for sprinkling over caramel and bars
1 cup light brown sugar
½ cup granulated sugar
1 egg
1 egg yolk
2 teaspoons vanilla extract
2 cups chocolate chips
10 ounces (about 36) caramel candy squares
3 tablespoons heavy cream
Sea salt or kosher salt, for sprinkling over caramel and bars
2. Unwrap the caramel candy squares and set aside.
3. In a microwaveable bowl, melt the butter/margarine. Set aside to allow it to cool to room temperature.
4. In a medium bowl, whisk together the flour, baking soda, salt, and xanthan gum; set aside.
5. Using an electric mixer, mix together the melted butter/margarine, sugar, and brown sugar on medium speed until combined.
6. Add the egg, egg yolk, and vanilla extract and mix until smooth.
7. Slowly add the dry ingredients and mix on low, just until combined. Stir in the chocolate chips.
8. In a medium microwave-safe bowl, combine the caramels and heavy cream. Microwave on high until the caramels are melted, stirring every 20 seconds. This will take about 2 minutes.
9. Press half of the cookie dough into the prepared pan, smoothing the top with the back of a spoon.
10. Pour the hot caramel over the dough cookie dough and spread into an even layer, leaving some empty space around the edges to prevent burning. Sprinkle the caramel with the sea salt.
11. Drop the remaining cookie dough in spoonfuls over the caramel and gently spread the dough with a spatula until the caramel is covered. Sprinkle the bars with additional sea salt.
12. Bake the cookie bars for 30 minutes, or until the top of the bars are light golden brown and the edges start to pull away from the pan.
13. Cool the bars on a wire rack to room temperature, then refrigerate for about 30 minutes to allow the caramel layer to set.
14. Cut into squares and serve. Store leftovers in an airtight container at room temperature.
Subscribe to:
Posts (Atom)